
Taylor Test Kits help pool and spa owners easily understand what's happening in their water, allowing them to make informed choices and maintain clean, clear, and enjoyable conditions. Whether you're new to water testing or simply looking to level up your testing routine, this guide and how-to video will walk you through how to use a test kit with confidence.
Step by Step: How to Test Your Pool Water
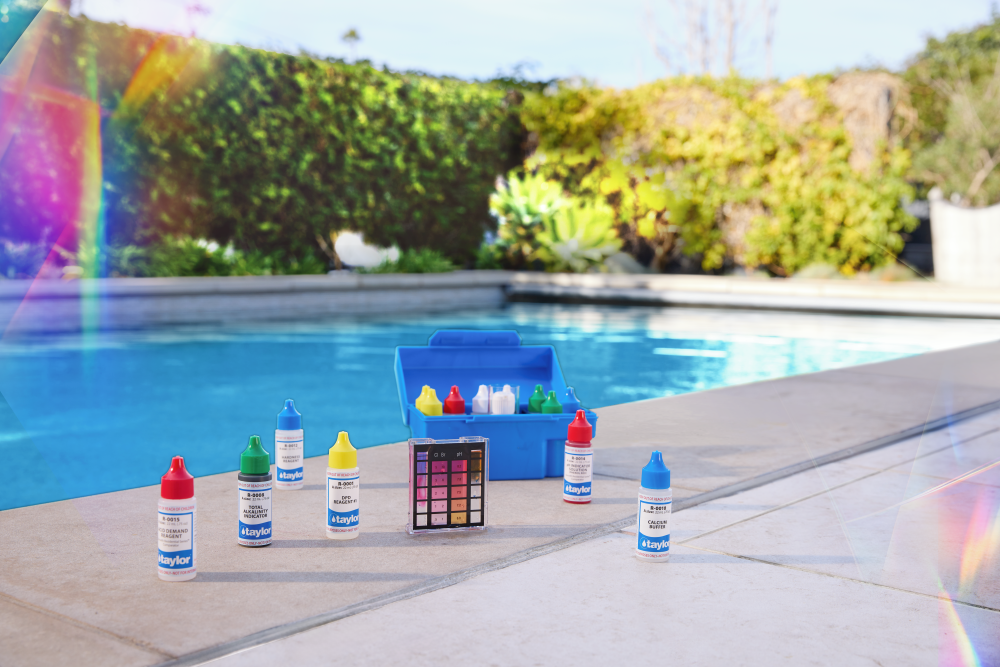
Before testing, it’s important to check the expiration date of your reagents to ensure accuracy. First, familiarize yourself with your test kit, taking note of how the bottles are color-coded and arranged in sequence to match the instructions. Always refer to your kit’s specific instructions for the best results.
Proper water sampling is the basis for accurate testing. Submerge your comparator or collection tube elbow-deep into the water, away from return lines, and fill it to the level indicated in your kit’s instructions. For reliable results, make sure your test water is always between 50 and 90 degrees Fahrenheit.
Taylor Test Kits require using different testing methods depending on what’s being measured. Here are some of the most common ones:
Method 1: Cap and Invert
Add the designated reagents to your water sample in the order stated in the instructions. Secure the cap on the comparator. Then, gently invert it to mix the solution.
Method 2: Use a Treated Sample from Another Test
Some tests require using the same water from a previous test for additional testing. For example, after conducting a pH test, you may need to add acid or base demand to determine what adjustments are needed. Always follow your kit’s instructions to ensure accurate results.
Method 3: Swirling with a Drop Indicator
First, add the designated reagents to your water sample in the order stated in the instructions. Then, begin titration by adding reagent droplets one at a time. Count the drops carefully and gently swirl the water after each drop. Continue adding and swirling until the sample reaches the color change specified in your kit’s instructions. The total number of drops used will determine the test result.
Method 4: Swirling with a Powder Indicator
First, add the appropriate amount of powder to the sample and swirl gently. Next, add reagents one drop at a time, counting each drop and gently swirling the water sample as you go. Continue adding and swirling until the sample reaches the color change specified in your kit’s instructions. The total number of drops used will determine the test result.
Reading Your Test Results
To read your results, hold the comparator at eye level in natural light, preferably against the sky, and match the color of the sample to the standards provided.
Best Practices for Reliable Results
To get accurate results from your pool or hot tub test kit, it helps to develop a few good habits. Try to test at the same time of day. Morning is usually best, before the water has been affected by the sun or bathers. This makes it easier to notice changes over time.
Also, keep your test kit in good condition. Store it in a cool, dry place, away from direct sunlight and heat. Tighten reagent bottles after they are opened. Replace reagents at the start of each swim season, or sooner if you notice a color or texture shift.
Common Mistakes to Avoid
While test kits are designed to be straightforward, a few missteps can lead to inaccurate results. One of the most common issues is cross-contaminating reagents by touching the dropper tips to the comparator block. Always hold the dropper above the cell without making contact.

Always hold the reagent dropper vertically above the comparator cell without making contact.
It's also vital to be patient. Skipping steps, inverting too rapidly, or not reading the results in the right time frame can all produce readings that don't accurately indicate your pool's condition. Avoid testing following chemical additions or when it's raining, as these situations can skew results.
Tracking your water test results allows you to detect subtle changes over time so you can adjust your treatment plan before issues build up.
Why Taylor Test Kits?
Taylor Test Kits have long been trusted in water testing for professionals and homeowners. What sets them apart is their scientific accuracy in a user-friendly design. Our products are made to order, and our durable, custom-molded cases help to keep all testing components secured and organized to help promote a smoother testing experience.
While test strips offer a quick snapshot, liquid test kits provide a more detailed view of your water chemistry. Whether testing for free chlorine, pH, total alkalinity, calcium hardness, or stabilizer levels, Taylor kits allow you to pinpoint exact concentrations and make the proper adjustments.
Kits like the K-1000 provide a fast and easy way to measure chlorine and pH—ideal for regular monitoring. The K-2005 offers a broader range of tests for more in-depth analysis, including total alkalinity, cyanuric acid, and more.
If you're unsure which kit is right for you, this blog post breaks down key considerations to help guide your decision.
Take Control of Your Pool & Spa Water
Knowing how to effectively utilize a pool test kit gives you the confidence to take control of your pool water balance, while regular testing enables you to detect changes early and make informed decisions.
Check out our pool and spa test kits and notice the difference clarity and accuracy can make.